 Hyundai Azera: Floor Console Assembly Repair procedures
Fifth generation HG (2011–2026) / Hyundai Azera 2011-2026 Service Manual / Body (Interior and Exterior) / Floor Console / Floor Console Assembly Repair procedures
Hyundai Azera: Floor Console Assembly Repair procedures
Fifth generation HG (2011–2026) / Hyundai Azera 2011-2026 Service Manual / Body (Interior and Exterior) / Floor Console / Floor Console Assembly Repair procedures
Fifth generation HG (2011–2026) / Hyundai Azera 2011-2026 Service Manual / Body (Interior and Exterior) / Floor Console / Floor Console Assembly Repair procedures
| Replacement |
|

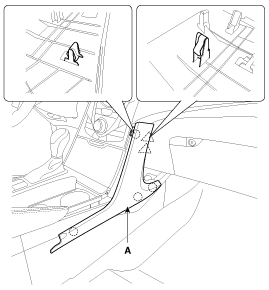
| 1. |
Using a screwdriver or remover, remove the center facia side garnish (A).
|
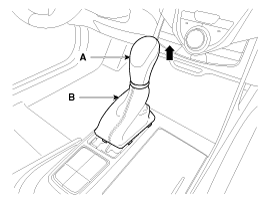
| 2. |
Remove the gear boots (B) and gear knob (A).
|
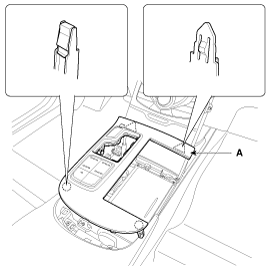
| 3. |
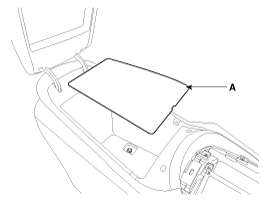
Using a screwdriver or remover, remove the console upper tray complete (A).
|
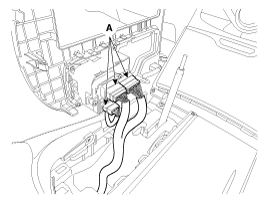
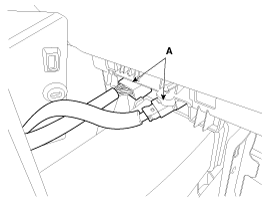
| 4. |
Disconnect the connectors (A).
|
| 5. |
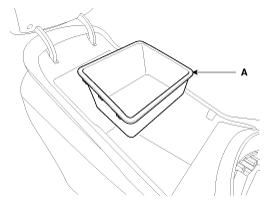
Remove the console tray (A).
|
| 6. |
Remove the console tray met (A).
|
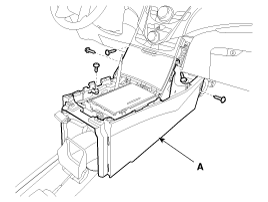
| 7. |
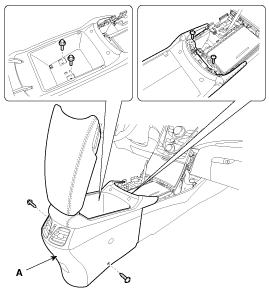
After loosening the mounting screws and bolts, then remove the console rear complete assembly (A).
|
| 8. |
Disconnect the connector (A).
|

| 9. |
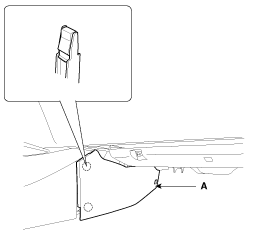
Using a screwdriver or remover, remove the console extension cover (A).
|
| 10. |
After loosening the mounting screws, then remove the console front complete assembly (A).
|

| 11. |
Disconnect the connectors (A).
|
| 12. |
Installation is the reverse of removal.
|
 Floor Console Assembly Components and Components Location
Component Location
[Rear]
1. Console rear complete assembly
[Front]
1. Console front complete assembly
...
 Rear Console Cover Components and Components Location
Component Location
1. Rear console cover
...
See also:
Oil Pan Components and Components Location
Components
1. Upper oil pan2. Lower oil pan3. Drain plug4. Drain plug gasket
...
Cylinder Block Repair procedures
Disassembly
•
Use fender covers to avoid damaging painted surfaces.
•
To avoid damage, unplug the wiring connectors carefully while holding the connector portion. ...
Checking the washer fluid level
Check the fluid level in the washer fluid reservoir and add fluid if necessary.
Plain water may be used if washer fluid is not available. However, use washer solvent
with antifreeze characteristics ...
Categories
Hyundai Azera Manuals

© 2011-2026 Copyright www.hgmanual.com