 Hyundai Azera: General Information
Fifth generation HG (2011–2024) / Hyundai Azera 2011-2024 Service Manual / General Information / Lift And Support Points / General Information
Hyundai Azera: General Information
Fifth generation HG (2011–2024) / Hyundai Azera 2011-2024 Service Manual / General Information / Lift And Support Points / General Information
Fifth generation HG (2011–2024) / Hyundai Azera 2011-2024 Service Manual / General Information / Lift And Support Points / General Information
| Lift And Support Points |
Lift And Support Points
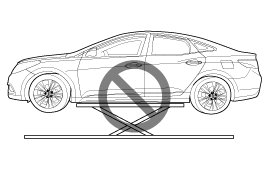
When heavy rear components such as suspension, fuel tank,
spare tire, tailgate and trunk lid are to be removed, place additional
weight in the luggage area before hoisting. When substantial weight is
removed from the rear of the vehicle, the center of gravity may change
and can cause the vehicle to tip forward on the hoist. |

|

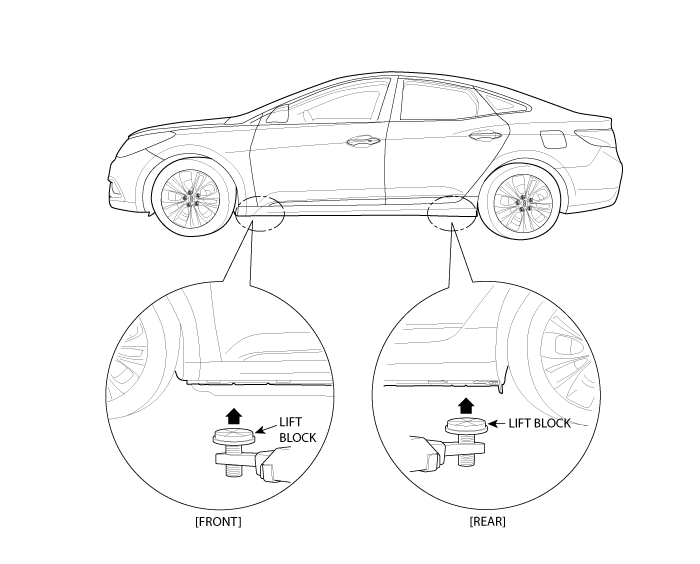
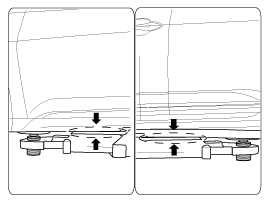
| 1. |
Place the lift blocks under the support points as shown in the illustration. |
| 2. |
Raise the hoist a few inches (centimeters) and rock the vehicle to be sure it is firmly supported. |
| 3. |
Raise the hoist to full height to inspect the lift points for secure support. |
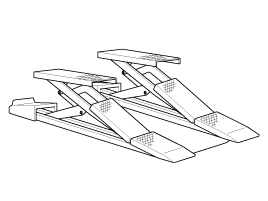
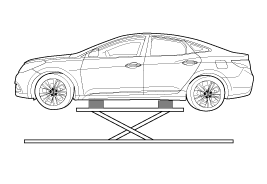
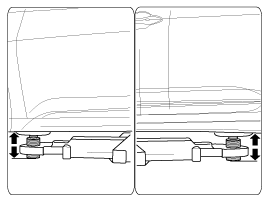
Using scissors lift
Using a scissors lift may cause damage of the side out seal
molding panel because the lift point is located higher than side out
seal molding panel.
Place wooden or rubber blocks (more than 50mm (1.9685in) in
height) between lift and vehicle lift point to prevent damage of the
side out seal molding panel.
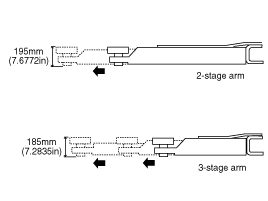
Using 2 post lift
Using a 2 post lift, there can be interference in lift arm and side out seal molding panel so that it can be damaged.
Adjust the telescopic pad height (3-stage arm : more than
185mm (7.2835in), 2-stage arm : more than 195mm (7.6772in)) before lift
up vehicle.
Check the contact surface between lift arm and side out seal molding panel during lift up the vehicle. |

 Towing
...
See also:
Rear Upper Arm Repair procedures
Removal
1.
Remove the rear wheel & tire (A).
Tightening torque:
88.3 ~ 107.9N.m (9.0 ~ 11.0kgf.m, 65.1 ~ 79.6lb-ft)
Be careful not to damage to the hub bolts when ...
Flat tire
...
Closing the fuel filler lid
1. To install the cap, turn it clockwise until it clicks one time. This indicates
that the cap is securely tightened.
2. Close the fuel filler lid and push it lightly and make sure that it is secure ...
Categories
Hyundai Azera Manuals

© 2011-2024 Copyright www.hgmanual.com