 Hyundai Azera: TPMS Sensor Repair procedures
Fifth generation HG (2011–2024) / Hyundai Azera 2011-2024 Service Manual / Suspension System / Tire Pressure Monitoring System / TPMS Sensor Repair procedures
Hyundai Azera: TPMS Sensor Repair procedures
Fifth generation HG (2011–2024) / Hyundai Azera 2011-2024 Service Manual / Suspension System / Tire Pressure Monitoring System / TPMS Sensor Repair procedures
Fifth generation HG (2011–2024) / Hyundai Azera 2011-2024 Service Manual / Suspension System / Tire Pressure Monitoring System / TPMS Sensor Repair procedures
| Removal |
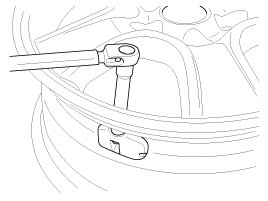
| 1. |
Remove the tire.
(Refer to Tires/Wheels - "Tire") |
| 2. |
Remove the valve nut.
|

| Installation |
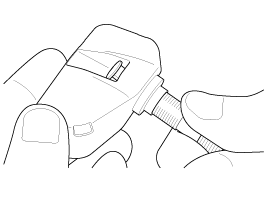
Sensor Fit
|
| 1. |
Assemble valve to sensor and turn valve 3 times with the square part of the screw in the slot.
|
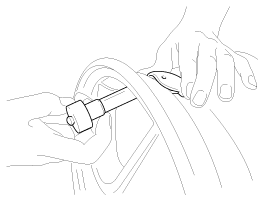
| 2. |
Mount assembly to wheel.
|
| 3. |
Tighten washer and nut by hand until the valve thread meets the nut built-in calibrated stop.
|
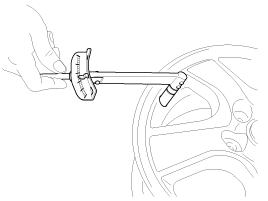
| 4. |
Using a torque wrench, tighten the nut to 2.95±0.37 lb-ft
(4.0±0.5 Nm) It is normal to feel a break as the 1.7 lb-ft (2.3Nm)
calibrated stop in the nut snaps and the torque falls.
|
|
Tire Fit
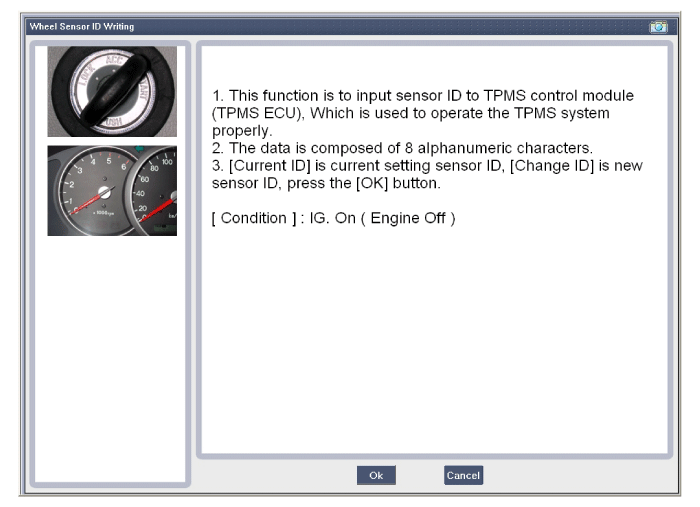
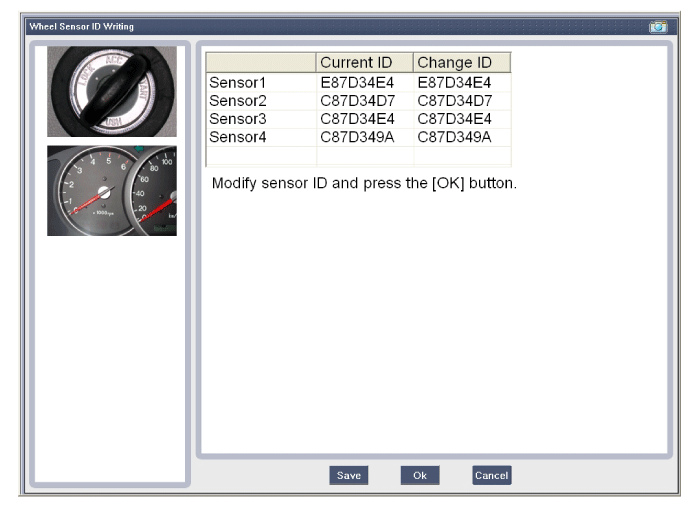
| Sensor ID Writing (Wireless) |
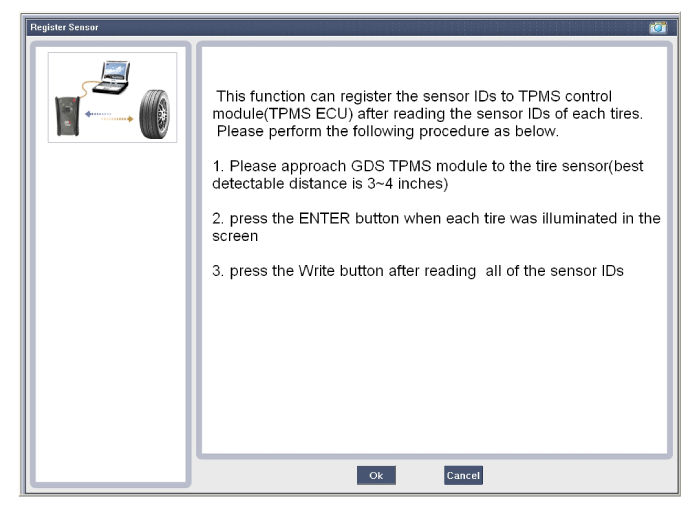
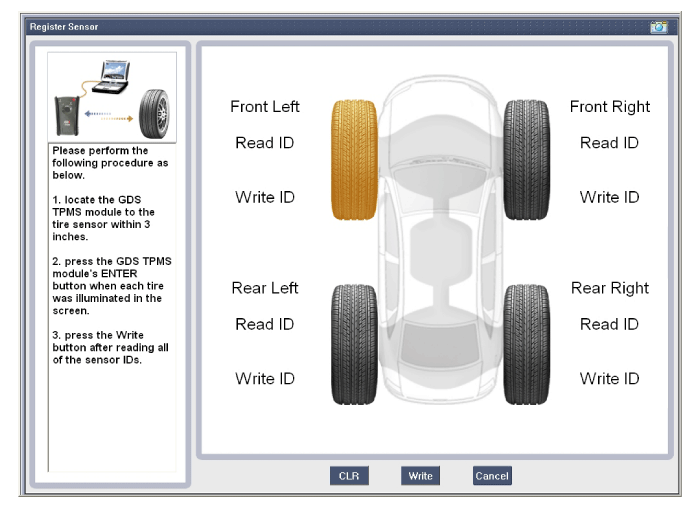
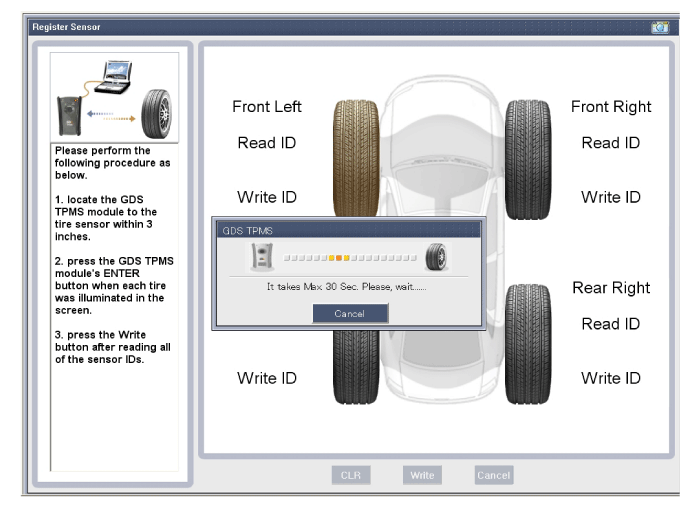
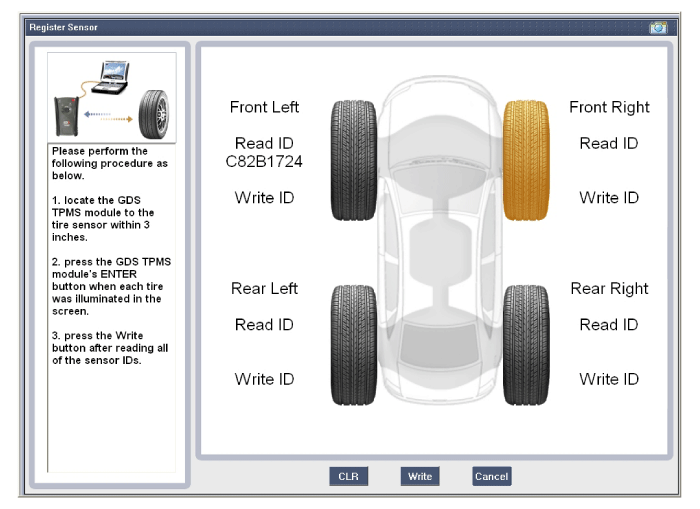
| Sensor ID Writing |
 TPMS Sensor Description and Operation
Description
1.
Mode
(1)
Configuration State
A.
All sensors should be in the Low Line state.
B.
In High Line configuration, sensor transmissions occur every 1 minute (nominal) and pressure ...
 TPMS Receiver Description and Operation
Description
1.
Mode
(1)
Virgin State
A.
The receiver as a sole part is shipped in this state. Replacement parts should therefore arrive in this state.
B.
In this state, there is no Auto-L ...
See also:
Refrigerant line Components and Components Location
Component Location
...
Description and Operation
Description
System Overview
The System offers the following features:
-
Human machine interface through a 1-stage button, for terminal switching and engine start.
-
Control of external re ...
Programming
To train most devices, follow these instructions:
1. For first-time programming, press and hold the two outside buttons (
, ), HomeLink® Channel 1 and Channel
3, until the indicator light begins ...
Categories
Hyundai Azera Manuals

© 2011-2024 Copyright www.hgmanual.com