 Hyundai Azera: Floor Console Assembly Repair procedures
Fifth generation HG (2011–2026) / Hyundai Azera 2011-2026 Service Manual / Body (Interior and Exterior) / Floor Console / Floor Console Assembly Repair procedures
Hyundai Azera: Floor Console Assembly Repair procedures
Fifth generation HG (2011–2026) / Hyundai Azera 2011-2026 Service Manual / Body (Interior and Exterior) / Floor Console / Floor Console Assembly Repair procedures
Fifth generation HG (2011–2026) / Hyundai Azera 2011-2026 Service Manual / Body (Interior and Exterior) / Floor Console / Floor Console Assembly Repair procedures
| Replacement |
|

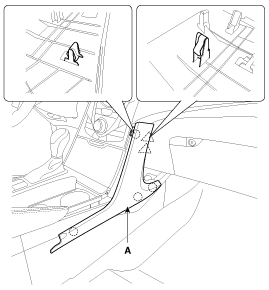
| 1. |
Using a screwdriver or remover, remove the center facia side garnish (A).
|
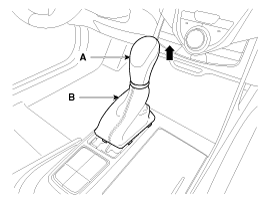
| 2. |
Remove the gear boots (B) and gear knob (A).
|
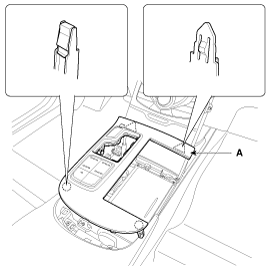
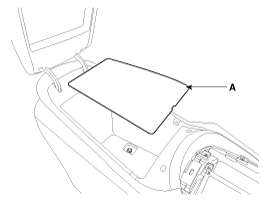
| 3. |
Using a screwdriver or remover, remove the console upper tray complete (A).
|
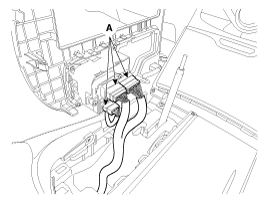
| 4. |
Disconnect the connectors (A).
|
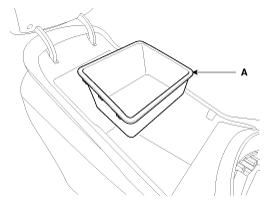
| 5. |
Remove the console tray (A).
|
| 6. |
Remove the console tray met (A).
|
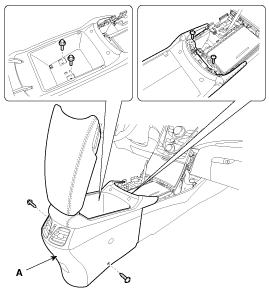
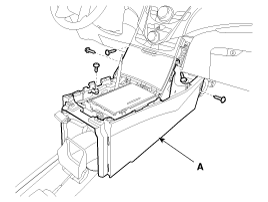
| 7. |
After loosening the mounting screws and bolts, then remove the console rear complete assembly (A).
|
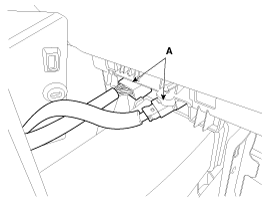
| 8. |
Disconnect the connector (A).
|

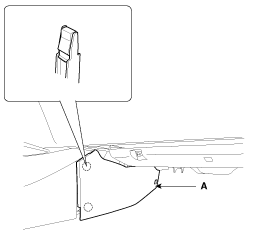
| 9. |
Using a screwdriver or remover, remove the console extension cover (A).
|
| 10. |
After loosening the mounting screws, then remove the console front complete assembly (A).
|

| 11. |
Disconnect the connectors (A).
|
| 12. |
Installation is the reverse of removal.
|
 Floor Console Assembly Components and Components Location
Component Location
[Rear]
1. Console rear complete assembly
[Front]
1. Console front complete assembly
...
 Rear Console Cover Components and Components Location
Component Location
1. Rear console cover
...
See also:
ESCL(Electronic Steering Column Lock) Repair procedures
Removal
1.
Disconnect the negative(-) battery terminal.
2.
Remove the crash pad lower panel.
(Refer to Body - "Crash Pad Lower Panel")
3.
Remove the steering column upper and lower shroud ...
Roof antenna Components and Components Location
Components
...
Removable towing hook (front, if equipped)
1. Open the trunk, and remove the towing hook from the tool case.
2. Remove the hole cover pressing the lower part of the cover on the front bumper.
3. Install the towing hook by turning it clockw ...
Categories
Hyundai Azera Manuals

© 2011-2026 Copyright www.hgmanual.com