 Hyundai Azera: Center Fascia Panel Repair procedures
Fifth generation HG (2011–2026) / Hyundai Azera 2011-2026 Service Manual / Body (Interior and Exterior) / Crash Pad / Center Fascia Panel Repair procedures
Hyundai Azera: Center Fascia Panel Repair procedures
Fifth generation HG (2011–2026) / Hyundai Azera 2011-2026 Service Manual / Body (Interior and Exterior) / Crash Pad / Center Fascia Panel Repair procedures
Fifth generation HG (2011–2026) / Hyundai Azera 2011-2026 Service Manual / Body (Interior and Exterior) / Crash Pad / Center Fascia Panel Repair procedures
| Replacement |
|

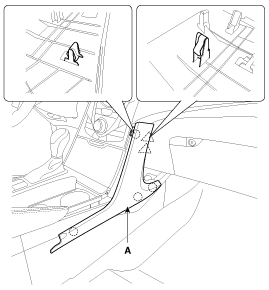
| 1. |
Using a screwdriver or remover, remove the center facia side garnish (A).
|
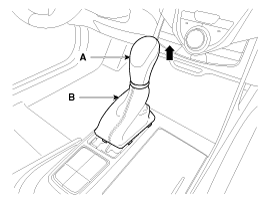
| 2. |
Remove the gear boots (B) and gear knob (A).
|
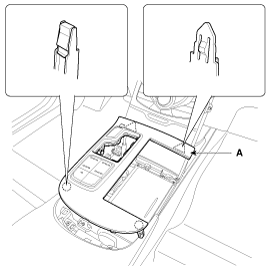
| 3. |
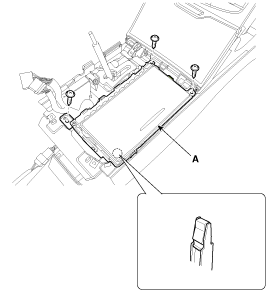
Using a screwdriver or remover, remove the console upper tray complete (A).
|
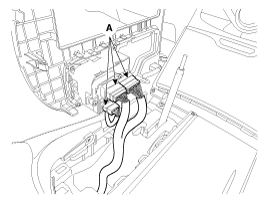
| 4. |
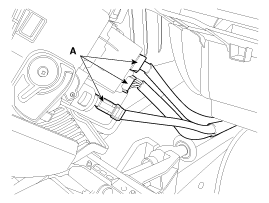
Disconnect the connectors (A).
|
| 5. |
After loosening the mounting screws, then remove the cup holder tray (A).
|
| 6. |
After loosening the mounting screws, then remove the center fascia tray (A).
|
| 7. |
Disconnect the connectors (A).
|
| 8. |
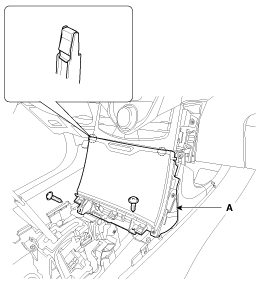
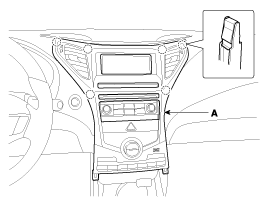
Using a screwdriver or remover, remove the center facia panel (A).
|
| 9. |
Disconnect the connectors (A).
|

| 10. |
Installation is the reverse of removal.
|

 Center Fascia Panel Components and Components Location
Component Location
1. Center fascia panel
...
 Crash Pad Lower Panel Components and Components Location
Component Location
1. Crash pad lower panel
...
See also:
Interior Body Repair
Interior A
Front pillar trim mounting hole (O8.5) Curtain airbag mounting hole (O6.6) Cowl crossbar mounting hole (O9) Front door checker mounting hole (O13)Cowl side trim mounting hole (6.5X18) ...
Checking the amount of air conditioner refrigerant and compressor lubricant
When the amount of refrigerant is low, the performance of the air conditioning
is reduced. Overfilling also has a negative impact on the air conditioning system.
Therefore, if abnormal operation is ...
Roof Trim Assembly Repair procedures
Replacement
•
Use a plastic panel removal tool to remove interior trim pieces to protect from marring the surface.
•
Put on gloves to protect your hands.
1. ...
Categories
Hyundai Azera Manuals

© 2011-2026 Copyright www.hgmanual.com