 Hyundai Azera: Cylinder Head Cover Repair procedures
Fifth generation HG (2011–2026) / Hyundai Azera 2011-2026 Service Manual / Engine Mechanical System / Cylinder Head Assembly / Cylinder Head Cover Repair procedures
Hyundai Azera: Cylinder Head Cover Repair procedures
Fifth generation HG (2011–2026) / Hyundai Azera 2011-2026 Service Manual / Engine Mechanical System / Cylinder Head Assembly / Cylinder Head Cover Repair procedures
Fifth generation HG (2011–2026) / Hyundai Azera 2011-2026 Service Manual / Engine Mechanical System / Cylinder Head Assembly / Cylinder Head Cover Repair procedures
| Removal |
| [LH] |
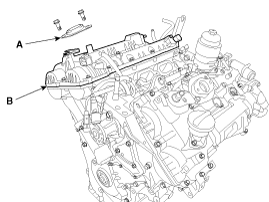
| 1. |
Remove the Intake manifold.
(Refer to Intake And Exhaust System - "Intake Manifold") |
| 2. |
Remove the high pressure fuel pump.
|
| 3. |
Remove the LH ignition coils.
|
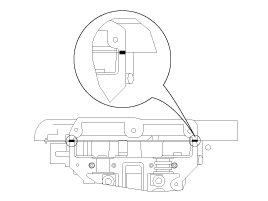
| 4. |
Remove the front engine hanger.
(Refer to Engine And Transmission Assembly - "Engine Hanger") |
| 5. |
Remove the LH cylinder head cover.
|


| [RH] |
| 1. |
Remove the surge tank.
(Refer to Intake And Exhaust System - "Surge Tank") |
| 2. |
Remove the RH ignition coils.
|
| 3. |
Remove the RH cylinder head cover.
|
| Installation |
| [LH] |
| 1. |
Install the LH cylinder head cover.
|

| 2. |
Install the other parts reverse order of removal. |
| [RH] |
| 1. |
Install the RH cylinder head cover.
|

| 2. |
Install the other parts reverse order of removal. |
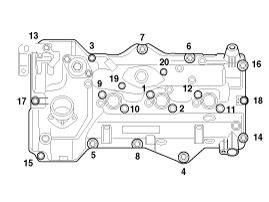
 Cylinder Head Cover Components and Components Location
Components
1. LH cylinder head cover2. LH cylinder head cover gasket3. RH cylinder head cover4. RH cylinder head cover gasket5. Exhaust CVVT OCV cap
...
 CVVT Assembly Components and Components Location
Components
1. RH exhaust CVVT2. RH intake CVVT3. LH intake CVVT4. LH exhaust CVVT
...
See also:
To defog inside windshield
1. Set the fan speed to the desired position.
2. Select desired temperature.
3. Press the defroster button ().
4. The air conditioning will be turned on according to the detected ambient temperat ...
Emergency trunk safety release
Your vehicle is equipped with an emergency trunk release cable located inside
the trunk. If someone is inadvertently locked in the trunk, moving the handle in
the direction of the arrow will rel ...
Output Speed Sensor Description and Operation
Description
The output speed sensor is a vital unit that measures the
rate of rotation of the transaxle's turbine shaft and output shaft, and
delivers the readings to the Transaxle Control Modu ...
Categories
Hyundai Azera Manuals

© 2011-2026 Copyright www.hgmanual.com