 Hyundai Azera: Changing tires
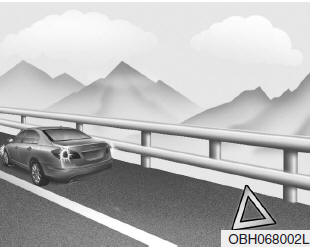
1. Park on a level surface and apply the parking brake firmly.
2. Place the transaxle shift lever in P (Park).
3. Activate the hazard warning flasher.

4. Remove the wheel lug nut wrench, jack, jack handle, and spare tire from the
vehicle.
5. Block both the front and rear of the wheel that is diagonally opposite from the
jack position.
✽ NOTICE
- To prevent vehicle movement while changing a tire, always set the parking brake fully, and always block the wheel diagonally opposite the wheel being changed.
- We recommend that the wheels of the vehicle be blocked, and that no person remain in a vehicle that is being jacked.
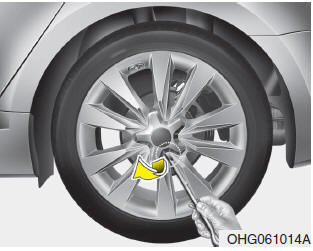
6. Insert the jack handle into the groove of the wheel cap and gently pry up the cap. (if equipped)
7. Loosen the wheel lug nuts counterclockwise one turn each, but do not remove any nut until the tire has been raised off the ground.
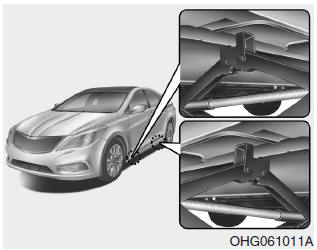
8. Place the jack at the front or rear jacking position closest to the tire you are changing. Place the jack at the designated locations under the frame. The jacking positions are plates welded to the frame with two tabs and a raised dot to index with the jack.
WARNING - Jack location
To reduce the possibility of injury, be sure to use only the jack provided with the vehicle and in the correct jack position; never use any other part of the vehicle for jack support.
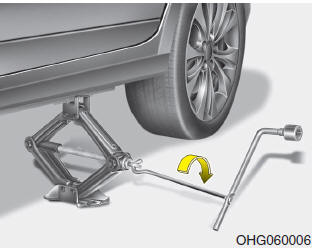
9. Insert the jack handle into the jack and turn it clockwise, raising the vehicle until the tire just clears the ground. This measurement is approximately 1.2 in. (30 mm). Before removing the wheel lug nuts, make sure the vehicle is stable and that there is no chance for movement or slippage.
10. Loosen the wheel nuts and remove them with your fingers. Slide the wheel off the studs and lay it flat so it cannot roll away. To put the wheel on the hub, pick up the spare tire, line up the holes with the studs and slide the wheel onto them. If this is difficult, tip the wheel slightly and get the top hole in the wheel lined up with the top stud. Then jiggle the wheel back and forth until the wheel can slide over the other studs.
Wheels may have sharp edges. Handle them carefully to avoid possible injury. Before putting the wheel into place, be sure that there is nothing on the hub or wheel (such as mud, tar, gravel, etc.) that prevents with the wheel from fitting solidly against the hub.
WARNING - Installing a wheel
Make sure the wheel makes good contact with the hub when installed. If the contact of the mounting surface between the wheel and hub is not good, the wheel nuts could come loose and cause the loss of a wheel. Loss of a wheel may result in loss of control of the vehicle, serious injury or death.
11. To install the wheel, hold it on the studs, put the wheel nuts on the studs
and tighten them finger tight. The nuts should be installed with their tappered
small diameter ends directed inward. Jiggle the tire to be sure it is completely
seated, then tighten the nuts as much as possible with your fingers again.
12. Lower the vehicle to the ground by turning the wheel nut wrench counterclockwise.
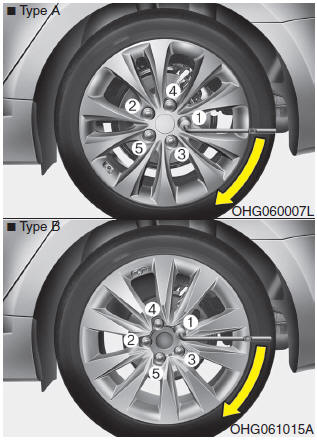
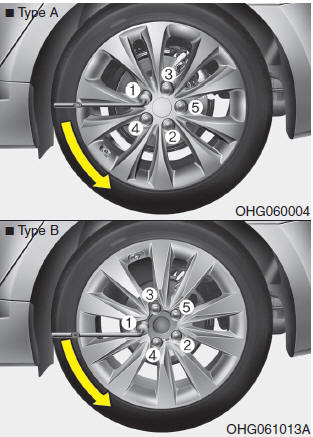
Then position the wrench as shown in the drawing and tighten the wheel nuts. Be sure the socket is seated completely over the nut. Do not stand on the wrench handle or use an extension pipe over the wrench handle. Go around the wheel tightening every nut following the numerical sequence shown in the image until they are all tight. Then double-check each nut for tightness. After changing wheels, have an authorized HYUNDAI dealer tighten the wheel nuts to their proper torque as soon as possible.
 Removing and storing the spare tire
Turn the tire hold-down wing bolt counterclockwise.
Store the tire in the reverse order of removal.
To prevent the spare tire and tools from “rattling” while the vehicle is in motion,
store t ...
 Wheel nut tightening torque:
65~79 lb·ft (9~11 kg·m)
If you have a tire gauge, remove the valve cap and check the air pressure. If
the pressure is lower than recommended, drive slowly to the nearest service station
and infla ...
See also:
Water Jacket Seperator Repair procedures
Removal
1.
Remove the LH/RH cylinder head assembly and gasket.
(Refer to Cylinder Head Assembly - "Cylinder Head")
2.
Remove the water jacket seperator (A).
Installation
1.
Install the ...
CVVT Oil Control Valve (OCV) Repair procedures
Inspection
1.
Turn the ignition switch OFF.
2.
Disconnect the OCV connector.
3.
Measure resistance between the OCV terminals 1 and 2.
4.
Check that the resistance is within the specifi ...
Basic Mode Screen
(1) Mode Displays currently operating mode.
(2) Operation State From Repeat / Shuffle / Scan, displays the currently operating
function.
(3) File Index Displays the current file number.
(4) Fi ...
Categories
Hyundai Azera Manuals
