 Hyundai Azera: Rear Lower Arm Repair procedures
Fifth generation HG (2011–2026) / Hyundai Azera 2011-2026 Service Manual / Suspension System / Rear Suspension System / Rear Lower Arm Repair procedures
Hyundai Azera: Rear Lower Arm Repair procedures
Fifth generation HG (2011–2026) / Hyundai Azera 2011-2026 Service Manual / Suspension System / Rear Suspension System / Rear Lower Arm Repair procedures
Fifth generation HG (2011–2026) / Hyundai Azera 2011-2026 Service Manual / Suspension System / Rear Suspension System / Rear Lower Arm Repair procedures
| Removal |
| 1. |
Remove the rear wheel & tire (A).
|


| 2. |
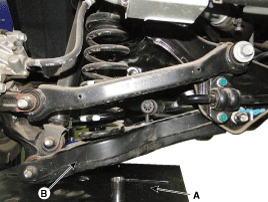
Set up the transmission jack (A) under the lower arm (B).
|
| 3. |
Loosen the nut and then remove the rear stabilizer link (A) from the lower arm and subframe.
|
| 4. |
Loosen the bolt & nut and then remove the rear lower arm (A) with the rear axle.
|
| 5. |
Loosen the bolt & nut and then remove the rear lower arm (A) from the sub frame.
|
| Installation |
| 1. |
Installation is the reverse of removal.
|
| Inspection |
| 1. |
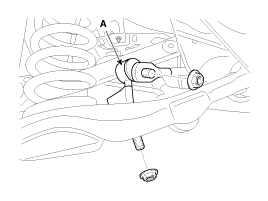
Check the bushing for wear and deterioration. |
| 2. |
Check the rear lower arm for deformation. |
| 3. |
Check for all bolts and nut. |
| 4. |
Check the cracks or the cutting of the lower arm. |
 Rear Upper Arm Repair procedures
Removal
1.
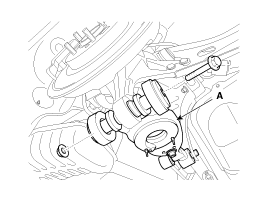
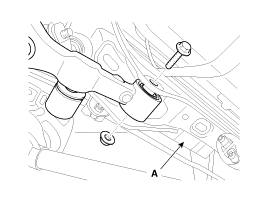
Remove the rear wheel & tire (A).
Tightening torque:
88.3 ~ 107.9N.m (9.0 ~ 11.0kgf.m, 65.1 ~ 79.6lb-ft)
Be careful not to damage to the hub bolts when ...
 Rear Stabilizer Bar Repair procedures
Replacement
1.
Remove the rear wheel & tire (A).
Tightening torque:
88.3 ~ 107.9N.m (9.0 ~ 11.0kgf.m, 65.1 ~ 79.6lb-ft)
•
Be careful not to damage to the hub ...
See also:
Rear Mud Guard Repair procedures
Replacement
•
When prying with a flat-tip screwdriver, wrap it with
protective tape, and apply protective tape around the related parts, to
prevent damage.
•
...
Front Pillar Trim Repair procedures
Replacement
•
Use a plastic panel removal tool to remove interior trim pieces to protect from marring the surface.
•
Take care not to bend or scratch the trim and ...
Bluetooth® Wireless Technology Setting
Pairing a New Device
Press the key
Select [Phone]
Select [Pair Phone]
Bluetooth® Wireless Technology devices can be paired with the audio system.
For more information, refer to the “Pairi ...
Categories
Hyundai Azera Manuals

© 2011-2026 Copyright www.hgmanual.com