 Hyundai Azera: Heater & A/C Control Unit(Full Automatic) Repair procedures
Fifth generation HG (2011–2026) / Hyundai Azera 2011-2026 Service Manual / Heating,Ventilation, Air Conditioning / Controller / Heater & A/C Control Unit(Full Automatic) Repair procedures
Hyundai Azera: Heater & A/C Control Unit(Full Automatic) Repair procedures
Fifth generation HG (2011–2026) / Hyundai Azera 2011-2026 Service Manual / Heating,Ventilation, Air Conditioning / Controller / Heater & A/C Control Unit(Full Automatic) Repair procedures
Fifth generation HG (2011–2026) / Hyundai Azera 2011-2026 Service Manual / Heating,Ventilation, Air Conditioning / Controller / Heater & A/C Control Unit(Full Automatic) Repair procedures
| Inspection |
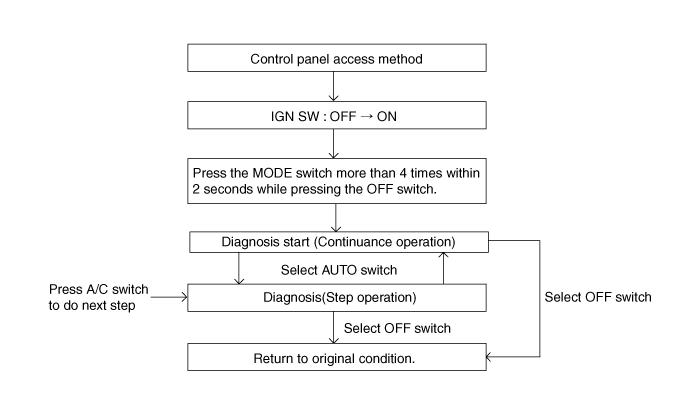
Self diagnosis
| 1. |
Self-diagnosis process
|
| 2. |
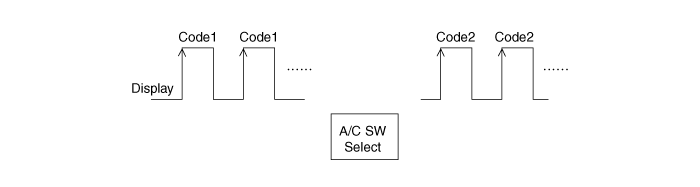
How to read self-diagnostic code.
After the display panel flickers three times every 0.5
second, the corresponding fault code flickers on the setup temperature
display panel every 0.5 second and will show two figures. Codes are
displayed in numerical format
Fault code
|
| 3. |
Fault code display
|


| 4. |
If fault codes are displayed during the check, Inspect malfunction causes by referring to fault codes. |
| 5. |
Fail safe.
|
| Replacement |
| 1. |
Disconnect the negative (-) battery terminal. |
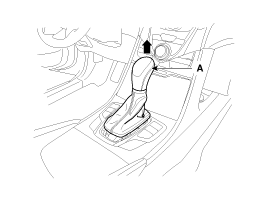
| 2. |
Remove the gear boots and gear knob (A).
|
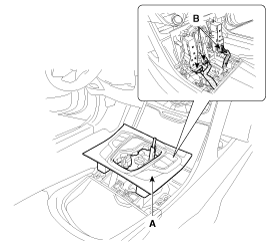
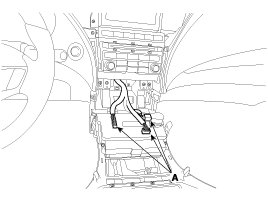
| 3. |
Remove the console upper cover (A) and then disconnect the connector (B).
|
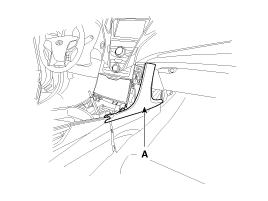
| 4. |
Remove the center fascia side garnish (A).
|
| 5. |
Remove the center fascia tray (A) and then disconnect the connector (B).
|
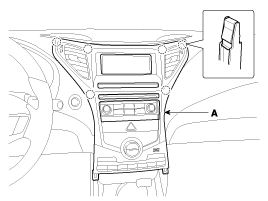
| 6. |
Using the screwdriver, remove the center fascia panel (A).
|
| 7. |
Disconnect the connectors (A) and then remove the center fascia panel (B) from the crash pad.
|
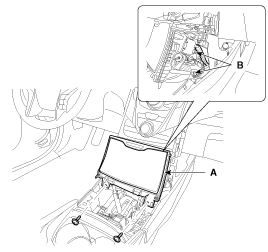
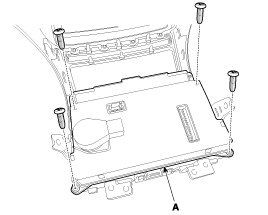
| 8. |
Loosen the mounting screws and then remove the heater and A/C controller (A).
|
| 9. |
Installation is the reverse order of removal. |
 Heater & A/C Control Unit(Full Automatic) Components and Components Location
Components
Connector pin function
ConnectorPIN NoFunctionConnectorPIN NoFunctionConnector (A)1Tail (+)Connector (A)27Evaporator Sensor (+)2Sensor REF (+5V)28-3CAN HIGH29Incar Sensor (+)4CAN LOW30D ...
See also:
Reverse parking aid function (if equipped)
While the vehicle is moving rearward, the outside rearview mirror(s) will move
downward to aid reverse parking. According to the position of the outside rearview
mirror switch (1), the outside r ...
Power Seat Control Switch Schematic Diagrams
Circuit Diagram
...
Components and Components Location
Component Location
1. Rear glass defogger relay (Engine room relay box)2. Rear glass defogger switch (A/C controller)3. Rear glass defogger
...
Categories
Hyundai Azera Manuals

© 2011-2026 Copyright www.hgmanual.com