
 Hyundai Azera: Front Seat Cushion Cover Repair procedures
Fifth generation HG (2011–2026) / Hyundai Azera 2011-2026 Service Manual / Body (Interior and Exterior) / Front Seat / Front Seat Cushion Cover Repair procedures
Fifth generation HG (2011–2026) / Hyundai Azera 2011-2026 Service Manual / Body (Interior and Exterior) / Front Seat / Front Seat Cushion Cover Repair procedures
| Replacement |
|

| 1. |
Remove the front seat shield inner cover.
(Refer to Front Seat - "Front Seat Shield Inner Cover") |
| 2. |
Remove the front seat shield outer cover.
(Refer to Front Seat - "Front Seat Shield Outer Cover") |
| 3. |
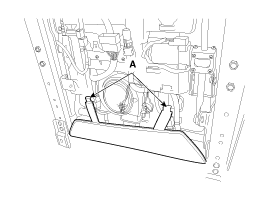
Remove the protector (A).
|
| 4. |
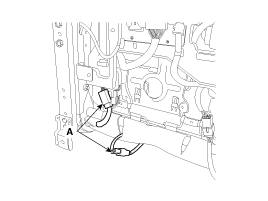
Disconnect the connectors (A).
|
| 5. |
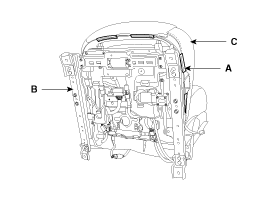
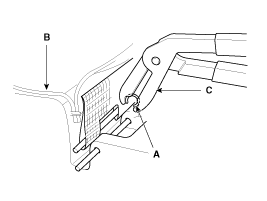
Push the protecter(A), and then front seat cushion cover (C) from the front seat frame (B).
|
| 6. |
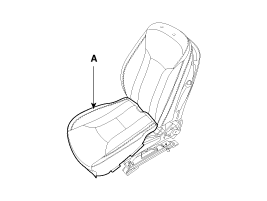
Remove the front seat cushion cover (A) from the front seat frame.
|
| 7. |
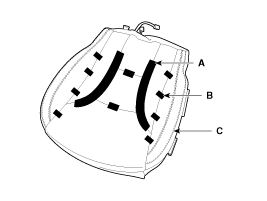
After removing the velcro tape (A) and hog-ring clips (B) on
the front of seat cushion and remove the front seat cushion cover (C).
|
| 8. |
Installation is the reverse of removal.
|

 Front Seat Cushion Cover Components and Components Location
Component Location
1. Front seat cushion cover
...
 Front Seat Frame Assembly Components and Components Location
Component Location
1. Front seat back frame assembly2. Front seat cushion frame assembly
...
See also:
Rear Door Latch Repair procedures
Replacement
1.
Remove the rear door module.
(Refer to Rear Door - "Rear Door Module")
2.
Disconnect the rear door latch connector (A).
3.
Remove the rear door latch assembly (A).
4.
I ...
Glove box lamp
The glove box lamp comes on when the glove box is opened.
The parking lights or headlights must be ON for the glove box lamp to function.
CAUTION
To prevent unnecessary charging system drain, c ...
CVVT Assembly Repair procedures
Removal
1.
Remove the timing chain.
(Refer to Timing System - "Timing Chain")
2.
Remove the CVVT assembly.
A.
A: LH exhaust CVVT
B.
B: LH intake CVVT
C.
C: RH intake CVVT
D.
D: ...
Categories
Hyundai Azera Manuals

© 2011-2026 Copyright www.hgmanual.com