
 Hyundai Azera: Front Stabilizer Bar Repair procedures
Fifth generation HG (2011–2026) / Hyundai Azera 2011-2026 Service Manual / Suspension System / Front Suspension System / Front Stabilizer Bar Repair procedures
Hyundai Azera: Front Stabilizer Bar Repair procedures
Fifth generation HG (2011–2026) / Hyundai Azera 2011-2026 Service Manual / Suspension System / Front Suspension System / Front Stabilizer Bar Repair procedures
Fifth generation HG (2011–2026) / Hyundai Azera 2011-2026 Service Manual / Suspension System / Front Suspension System / Front Stabilizer Bar Repair procedures
| Replacement |
| 1. |
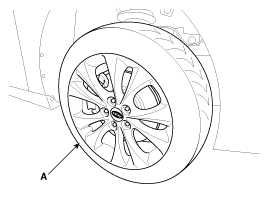
Remove the front wheel & tire (A).
|

| 2. |
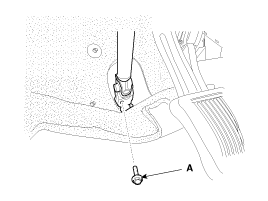
Loosen the bolt (A) and then disconnect the universal joint assembly from the pinion of the steering gear box.
|
| 3. |
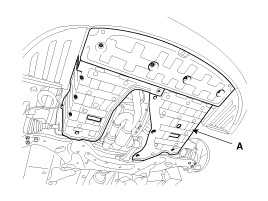
Remove the under cover (A).
|
| 4. |
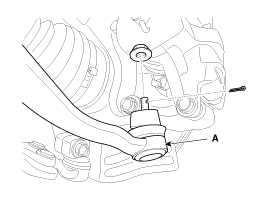
Remove the sprit pin and castle nut and then disconnect the tie-rod end (A) from the front knuckle.
|
| 5. |
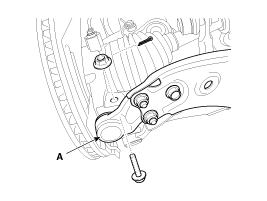
Loosen the bolt & nut and then remove the lower arm (A).
|
| 6. |
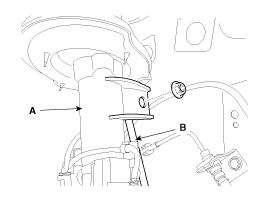
Disconnect the stabilizer link (B) with the front strut assembly (A) after loosening the nut.
|
| 7. |
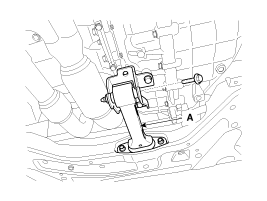
Loosen the bolt and then remove the front roll stopper (A).
|
| 8. |
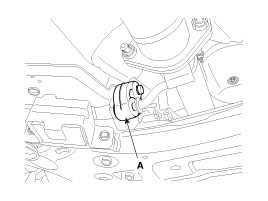
Disconnect the muffler rubber hanger (A).
|
| 9. |
Loosen the bolts & nuts and then remove the sub frame (A).
|
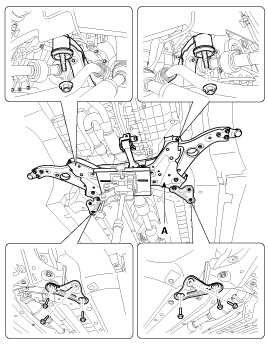
| 10. |
Remove the front stabilizer bar (A).
|
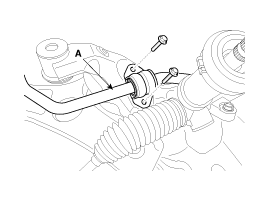
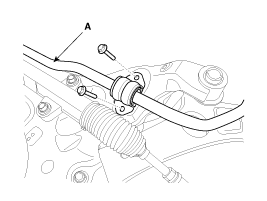
| 11. |
Loosen the nut and then remove the stabilizer link (A) from the stabilizer bar.
|
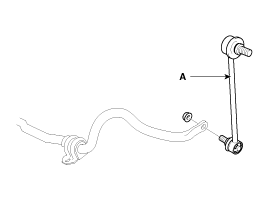
| 12. |
Installation is the reverse of removal. |
| 13. |
Check the alignment.
(Refer to Tires/Wheels - "Alignment") |
| Inspection |
| 1. |
Check the bushing for wear and deterioration. |
| 2. |
Check the front stabilizer bar for deformation. |
 Front Lower Arm Repair procedures
Replacement
1.
Remove the front wheel & tire (A).
Tightening torque:
88.3 ~ 107.9N.m (9.0 ~ 11.0kgf.m, 65.1 ~ 79.6lb-ft)
Be careful not to damage to the hub bolts ...
 Sub Frame Repair procedures
Replacement
1.
Remove the front wheel & tire (A).
Tightening torque :
88.3 ~ 107.9N.m (9.0 ~ 11.0kgf.m, 65.1 ~ 79.6lb-ft)
•
Be careful not to damage to the hu ...
See also:
Power Mosfet Repair procedures
Inspection
1.
Ignition "ON"
2.
Manually operate the control switch and measure the voltage of blower motor.
3.
Select the control switch to raise voltage until high speed.
1. Drain2. Dr ...
Using Radio Mode
Selecting Presets
Press the key
Select
The 6 presets are displayed. Press the
~
key to play the desired preset.
Saving Presets
After selecting the frequency Press
and hold the desir ...
Power Window Switch Schematic Diagrams
Circuit Diagram
Driver Power Window Switch (1)
Driver Power Window Switch (2)
Passenger Power Window Swich
Rear Power Window Swich
...
Categories
Hyundai Azera Manuals

© 2011-2026 Copyright www.hgmanual.com