 Hyundai Azera: Power Seat Control Switch Repair procedures
Fifth generation HG (2011–2026) / Hyundai Azera 2011-2026 Service Manual / Body Electrical System / Seat Electrical / Power Seat Control Switch Repair procedures
Hyundai Azera: Power Seat Control Switch Repair procedures
Fifth generation HG (2011–2026) / Hyundai Azera 2011-2026 Service Manual / Body Electrical System / Seat Electrical / Power Seat Control Switch Repair procedures
Fifth generation HG (2011–2026) / Hyundai Azera 2011-2026 Service Manual / Body Electrical System / Seat Electrical / Power Seat Control Switch Repair procedures
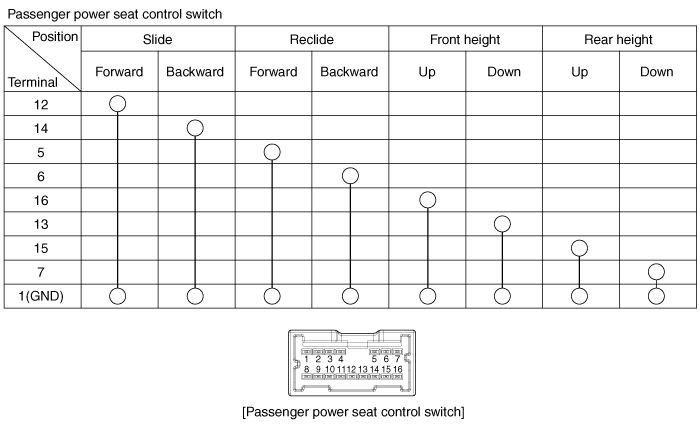
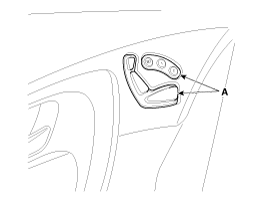
| Inspection |
With the power seat switch in each position, make sure that
continuity exists between the terminals below. If continuity is not as
specified, replace the power seat switch.
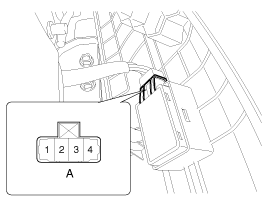
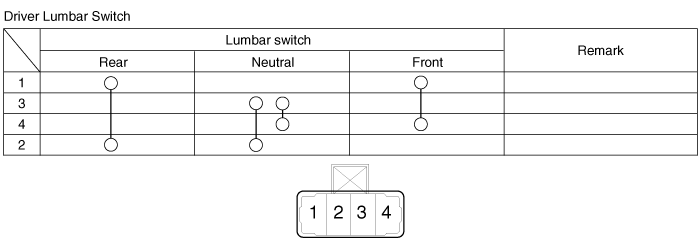
A : Lumbar support switch
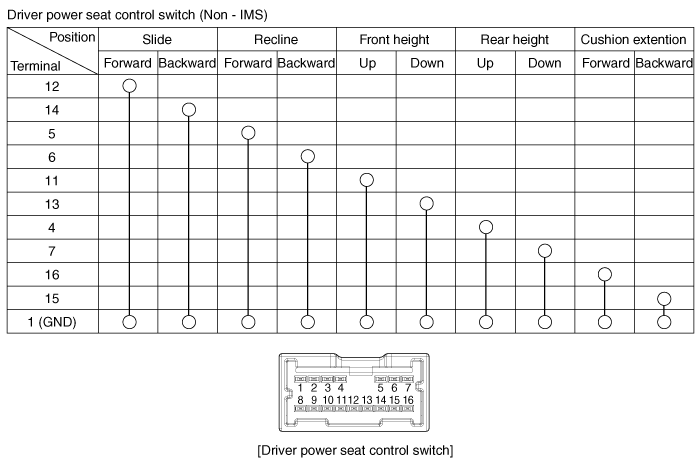
In case of IMS switch inspection, refer to "IMS" system. |

| Removal |
| Lumbar Switch |
| 1. |
Disconnect the negative (-) battery terminal. |
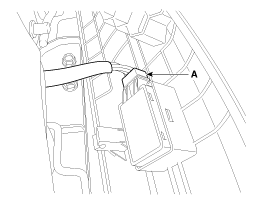
| 2. |
Remove the seat side cover (A).
|

| 3. |
Disconnect the lumbar switch connector (A).
|
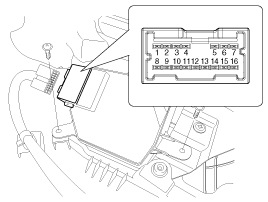
Power seat control switch
| 1. |
Disconnect the negative (-) battery terminal. |
| 2. |
Remove the door trim (A) after loosening mounting screws.
|
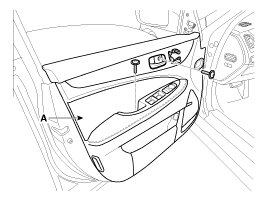
| 3. |
Remove the memory power seat control switch (A) after loosening connector and screws (3EA) from the door trim.
|
| Installation |
|
| Lumbar Switch |
| 1. |
Connect the connectors and reassemble the lumbar control switch. |
| 2. |
Reassemble the seat side cover. |
Power seat control switch
|
| 1. |
Install the memory power seat control switch after connecting the switch connector. |
| 2. |
Install the driver door trim. |
| 3. |
Install the negative (-) battery terminal. |
 Power Seat Control Switch Schematic Diagrams
Circuit Diagram
...
 Seat Heater Components and Components Location
Component Location
...
See also:
Filter replacement
It must be replaced when necessary, and should not be washed.
You can clean the filter when inspecting the air cleaner element.
1. Loosen the air cleaner cover attaching clips and open the cover ...
Tire pressure monitoring system
(1) Low tire pressure telltale / TPMS malfunction indicator
(2) Low tire pressure position telltale (Shown on the LCD display)
Each tire, including the spare (if provided), should be checked month ...
Relay Box (Passenger Compartment) Components and Components Location
Components
...
Categories
Hyundai Azera Manuals

© 2011-2026 Copyright www.hgmanual.com