 Hyundai Azera: Floor Console Assembly Repair procedures
Fifth generation HG (2011–2026) / Hyundai Azera 2011-2026 Service Manual / Body (Interior and Exterior) / Floor Console / Floor Console Assembly Repair procedures
Hyundai Azera: Floor Console Assembly Repair procedures
Fifth generation HG (2011–2026) / Hyundai Azera 2011-2026 Service Manual / Body (Interior and Exterior) / Floor Console / Floor Console Assembly Repair procedures
Fifth generation HG (2011–2026) / Hyundai Azera 2011-2026 Service Manual / Body (Interior and Exterior) / Floor Console / Floor Console Assembly Repair procedures
| Replacement |
|

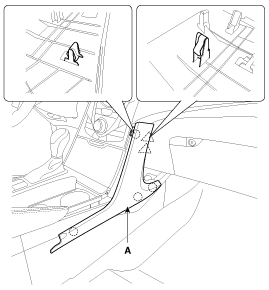
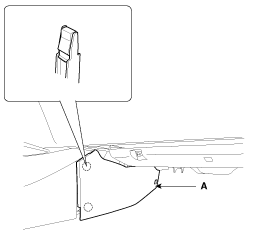
| 1. |
Using a screwdriver or remover, remove the center facia side garnish (A).
|
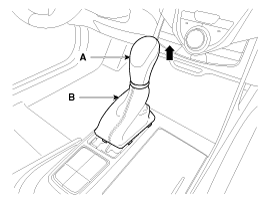
| 2. |
Remove the gear boots (B) and gear knob (A).
|
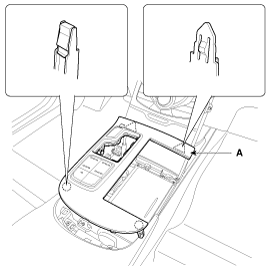
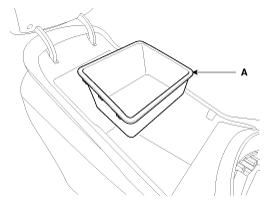
| 3. |
Using a screwdriver or remover, remove the console upper tray complete (A).
|
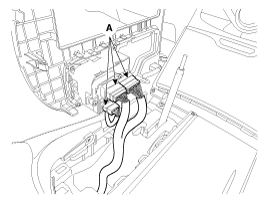
| 4. |
Disconnect the connectors (A).
|
| 5. |
Remove the console tray (A).
|
| 6. |
Remove the console tray met (A).
|
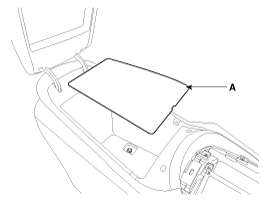
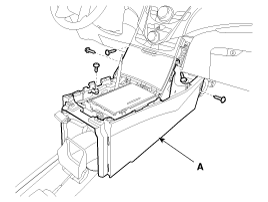
| 7. |
After loosening the mounting screws and bolts, then remove the console rear complete assembly (A).
|
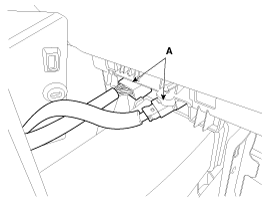
| 8. |
Disconnect the connector (A).
|

| 9. |
Using a screwdriver or remover, remove the console extension cover (A).
|
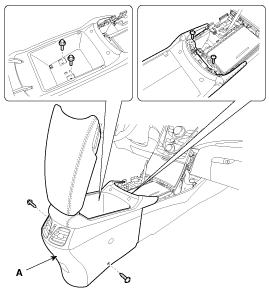
| 10. |
After loosening the mounting screws, then remove the console front complete assembly (A).
|

| 11. |
Disconnect the connectors (A).
|
| 12. |
Installation is the reverse of removal.
|
 Floor Console Assembly Components and Components Location
Component Location
[Rear]
1. Console rear complete assembly
[Front]
1. Console front complete assembly
...
 Rear Console Cover Components and Components Location
Component Location
1. Rear console cover
...
See also:
SS-A Solenoid Valve(ON/OFF) Specifications
Specifications
ON/OFF Solenoid Valve(SS-A, SS-B)
? Control type : Normal low type
Control pressure [kpa (kgf/cm?, psi)]490.33(5.0, 71.12) Internal resistance(?)10~11
...
Rear Pillar Trim Components and Components Location
Component Location
1. Rear pillar trim
...
Specifications
Specifications
IMS Electrical System
ItemSpecificationRating voltageDC 12VOperating voltageDC 9V ~ 16VOperating temperature-30°C ~ +80°CMaintaining temperature-40°C ~ +85°CMax, humid95%Consump ...
Categories
Hyundai Azera Manuals

© 2011-2026 Copyright www.hgmanual.com