 Hyundai Azera: Floor Console Assembly Repair procedures
Fifth generation HG (2011–2026) / Hyundai Azera 2011-2026 Service Manual / Body (Interior and Exterior) / Floor Console / Floor Console Assembly Repair procedures
Hyundai Azera: Floor Console Assembly Repair procedures
Fifth generation HG (2011–2026) / Hyundai Azera 2011-2026 Service Manual / Body (Interior and Exterior) / Floor Console / Floor Console Assembly Repair procedures
Fifth generation HG (2011–2026) / Hyundai Azera 2011-2026 Service Manual / Body (Interior and Exterior) / Floor Console / Floor Console Assembly Repair procedures
| Replacement |
|

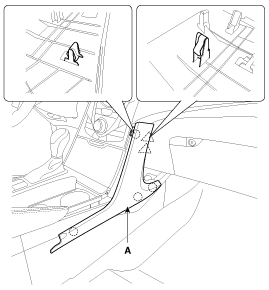
| 1. |
Using a screwdriver or remover, remove the center facia side garnish (A).
|
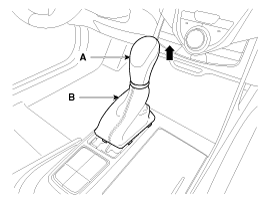
| 2. |
Remove the gear boots (B) and gear knob (A).
|
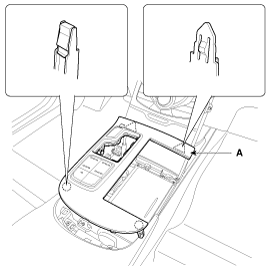
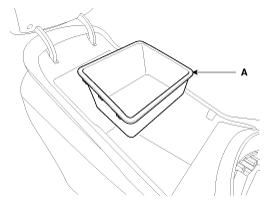
| 3. |
Using a screwdriver or remover, remove the console upper tray complete (A).
|
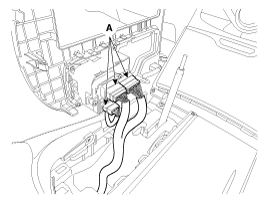
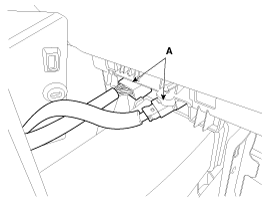
| 4. |
Disconnect the connectors (A).
|
| 5. |
Remove the console tray (A).
|
| 6. |
Remove the console tray met (A).
|
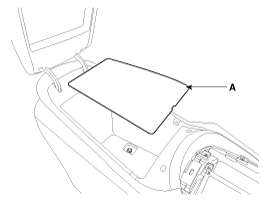
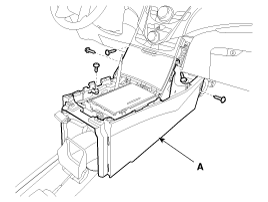
| 7. |
After loosening the mounting screws and bolts, then remove the console rear complete assembly (A).
|
| 8. |
Disconnect the connector (A).
|

| 9. |
Using a screwdriver or remover, remove the console extension cover (A).
|
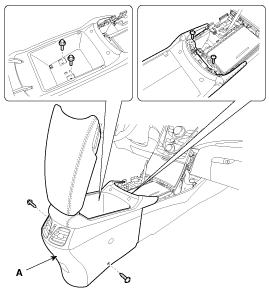
| 10. |
After loosening the mounting screws, then remove the console front complete assembly (A).
|

| 11. |
Disconnect the connectors (A).
|
| 12. |
Installation is the reverse of removal.
|
 Floor Console Assembly Components and Components Location
Component Location
[Rear]
1. Console rear complete assembly
[Front]
1. Console front complete assembly
...
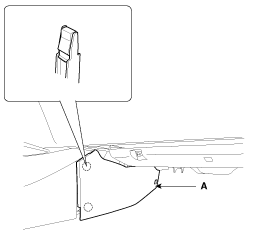
 Rear Console Cover Components and Components Location
Component Location
1. Rear console cover
...
See also:
Purge Control Solenoid Valve (PCSV) Repair procedures
Inspection
1.
Turn the ignition switch OFF.
2.
Disconnect the PCSV connector.
3.
Measure resistance between the PCSV terminals 1 and 2.
4.
Check that the resistance is within the speci ...
Front Seat Belt Pretensioner Repair procedures
Replacement
•
When installing the belt, make sure not to damage the pretensioner.
1.
Remove the front seat assembly.
(Refer to Front Seat - "Front Seat Assembly") ...
Using the Room Mirror Key
Selecting the room mirror key will allow you to make service required inquiries,
POI info searches, and emergency rescues by connecting to the Blue Link® Center.
Such features can be used only afte ...
Categories
Hyundai Azera Manuals

© 2011-2026 Copyright www.hgmanual.com