| • |
When prying with a flat-tip screwdriver, wrap it with
protective tape, and apply protective tape around the related parts, to
prevent damage. |
| • |
Put on gloves to protect your hands. |
| • |
Take care not to scratch the body surface. |
|
| 1. |
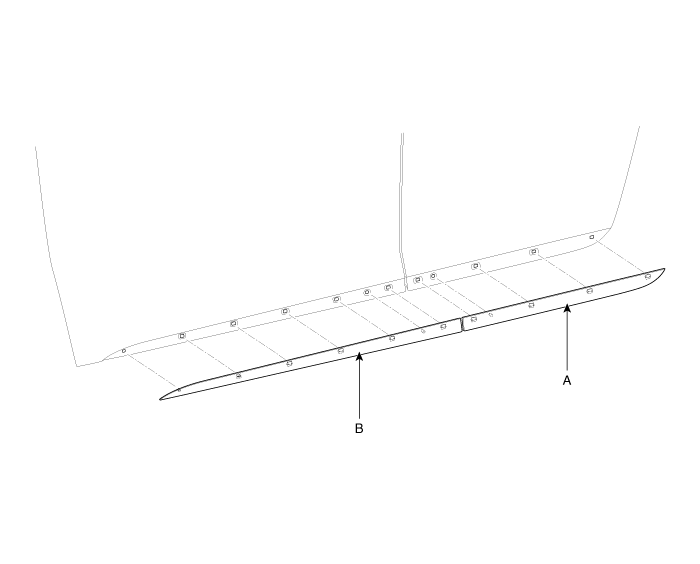
Using a screwdriver or remover, remove the front waist line molding (A). |
| 2. |
Using a screwdriver or remover, remove the rear waist line molding (B). |
| 3. |
Installation is the reverse of removal.
| • |
Replace any damaged clips. |
|
|
Replacement
•
When prying with a flat-tip screwdriver, wrap it with
protective tape, and apply protective tape around the related parts, to
prevent damage.
•
...
Replacement
•
When prying with a flat-tip screwdriver, wrap it with
protective tape, and apply protective tape around the related parts, to
prevent damage.
•
...
See also:
Components and Components Location
Components Location
1. Automatic transaxle2. Valve body assembly3. Oil pump assembly
...
Front Door Window Glass Repair procedures
Replacement
1.
Remove the front door trim.
(Refer to Front Door - "Front Door Trim")
2.
Remove the front door window glass mounting hole plug (B).
•
Use the door s ...
Description and Operation
Description
Communication network diagram
AbbreviationExplanationC_CANChassis Controller Area NetworkB_CANBody Controller Area NetworkMM_CANMulti media Controller Area NetworkSMKSmart Key ECUD ...
 Hyundai Azera: Waist Line Molding Repair procedures
Fifth generation HG (2011–2026) / Hyundai Azera 2011-2026 Service Manual / Body (Interior and Exterior) / Body Side Molding / Waist Line Molding Repair procedures
Hyundai Azera: Waist Line Molding Repair procedures
Fifth generation HG (2011–2026) / Hyundai Azera 2011-2026 Service Manual / Body (Interior and Exterior) / Body Side Molding / Waist Line Molding Repair procedures


 Rear Mud Guard Repair procedures
 Side Sill Molding Repair procedures