 Hyundai Azera: Repair procedures
Fifth generation HG (2011–2026) / Hyundai Azera 2011-2026 Service Manual / Body (Interior and Exterior) / Rear Door / Repair procedures
Hyundai Azera: Repair procedures
Fifth generation HG (2011–2026) / Hyundai Azera 2011-2026 Service Manual / Body (Interior and Exterior) / Rear Door / Repair procedures
Fifth generation HG (2011–2026) / Hyundai Azera 2011-2026 Service Manual / Body (Interior and Exterior) / Rear Door / Repair procedures
| Adjustment |
Glass Adjustment
|

| 1. |
Remove the rear door trim.
(Refer to Rear Door - "Rear Door Trim") |
| 2. |
Remove the rear door window glass mounting hole plug (B). |
| 3. |
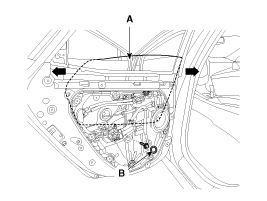
Carefully move the rear door window glass (A) until the glass mounting bolts are visible, then loosen them.
|
| 4. |
Check that the glass moves smoothly. |
Door Striker Adjustment
| • |
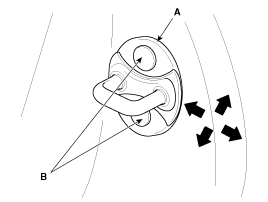
Make sure the door latches securely without slamming it. If
necessary adjust the striker (A): The striker nuts are fixed. The
striker can be fine adjusted up or down, and in or out. |
| 1. |
Loosen the screws (B) just enough for the striker to move.
|
| 2. |
Tap on the striker with a plastic hammer to adjust the striker. The striker will not move much, but will give some adjustment. |
| 3. |
Hold the outer handle out, and push the door against the body
to be sure the striker allows a flush fit. If the door latches
properly, tighten the screws and recheck. |
Door Position Adjustment
|
| 1. |
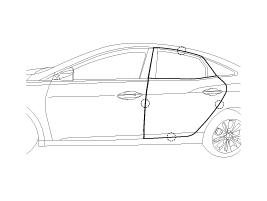
Check that the door and body edges are parallel.
|
| 2. |
Place the vehicle on a firm, level surface when adjusting the doors. |
| 3. |
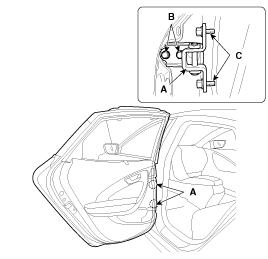
Adjust at the hinges (A) :
|
| 4. |
Grease the pivot portions of the hinges indicated by the arrows. |
| 5. |
Check for water leaks. |
 Components and Components Location
Components
1. Rear door trim2. Rear door inside handle cap3. Rear door module4. Rear frame inner cover5. Rear door panel6. Rear door delta lower run & channel7. Rear door frame rear garnish8 ...
 Rear Door Trim Components and Components Location
Component Location
1. Rear door trim
...
See also:
Power Window Switch Repair procedures
Inspection
Driver Power Window Switch
1.
When checking the driver power window switch, select a vehicle type and "IPM" menu.
2.
Select "DDM (Driver Door Module)".
3.
Select option "Input/ ...
Fuel Pressure Control Valve (FPCV) Specifications
Specification
ItemSpecificationCoil Resistance (?)1.04 ~ 1.27 [23°C(73.4°F)]
...
Categories
Hyundai Azera Manuals

© 2011-2026 Copyright www.hgmanual.com